MeshCore is one of the most exciting tools to come along in years — and our club is actively building it out across Pend Oreille County along with the broader Inland Northwest mesh community. Best of all, MeshCore does not require a ham radio license to get started — anyone can jump in and participate. This page is your friendly introduction: what MeshCore is, how it works, why it matters for hams and non-hams, and how you can get started even if you have never touched a mesh radio before.
Think of MeshCore as a digital text messaging network that does not need cell towers or the internet in the traditional sense. Instead, small radio nodes talk to each other directly over long distances using LoRa — a low-power, long-range radio technology. Messages hop from node to node across the landscape, forming a mesh that grows stronger as more people participate.
A live map view of MeshCore nodes — each dot represents a radio helping extend the network.
MeshCore is an open, LoRa-based mesh networking platform designed for off-grid communication. You can send text messages, check in on a map, ping nodes to see who is reachable, and build a resilient communications network that keeps working when everything else fails — power outages, wildfires, winter storms, or simply living on a remote homestead with no cell service.
Unlike APRS or traditional packet radio, MeshCore is built from the ground up for modern, low-power hardware and easy smartphone-style messaging. It is an excellent fit for ham radio operators, GMRS users interested in digital comms, emergency preparedness groups, and anyone who wants a backup plan when the grid goes down. Learn more at the official MeshCore website.
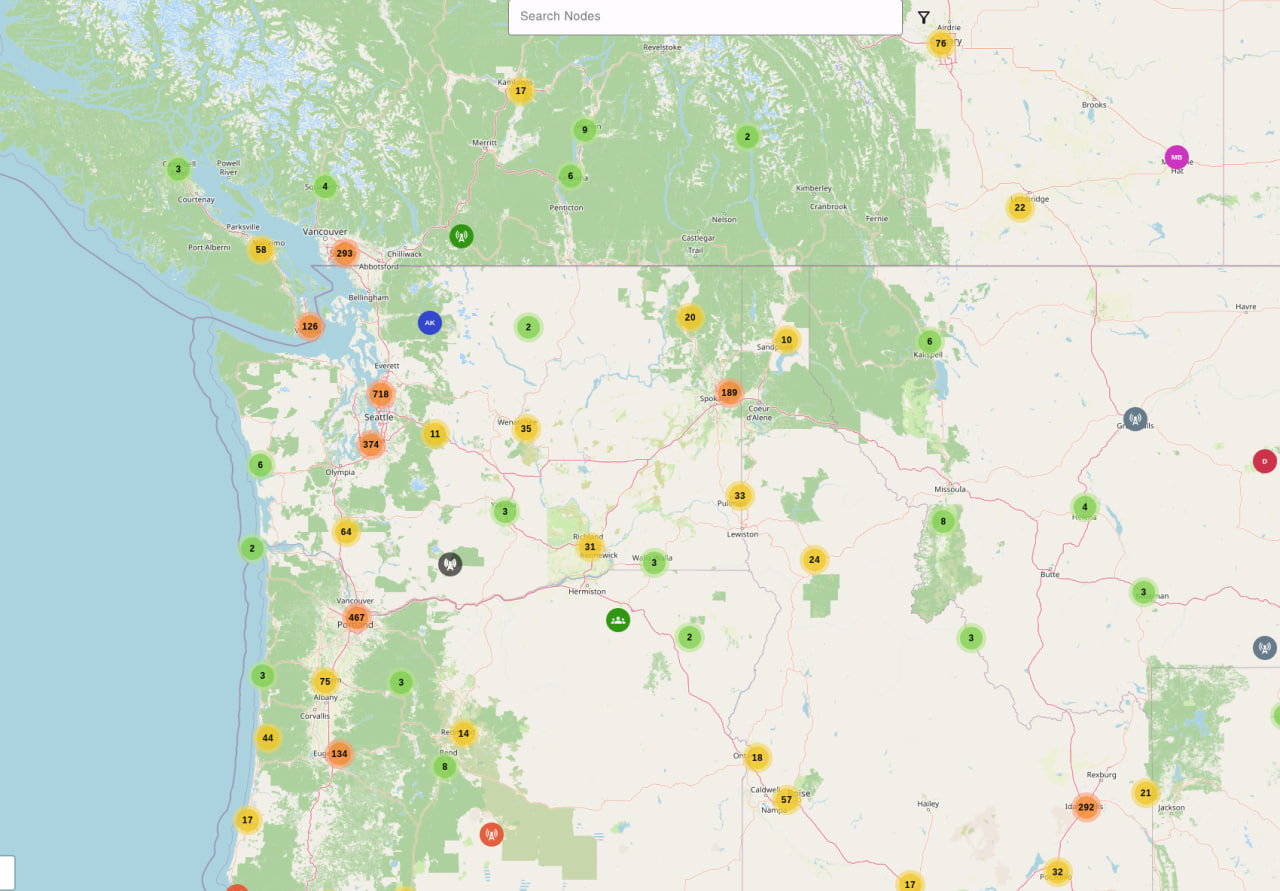
The global MeshCore node map — zoom in to see activity near you. This link opens centered on our region in the Inland Northwest.
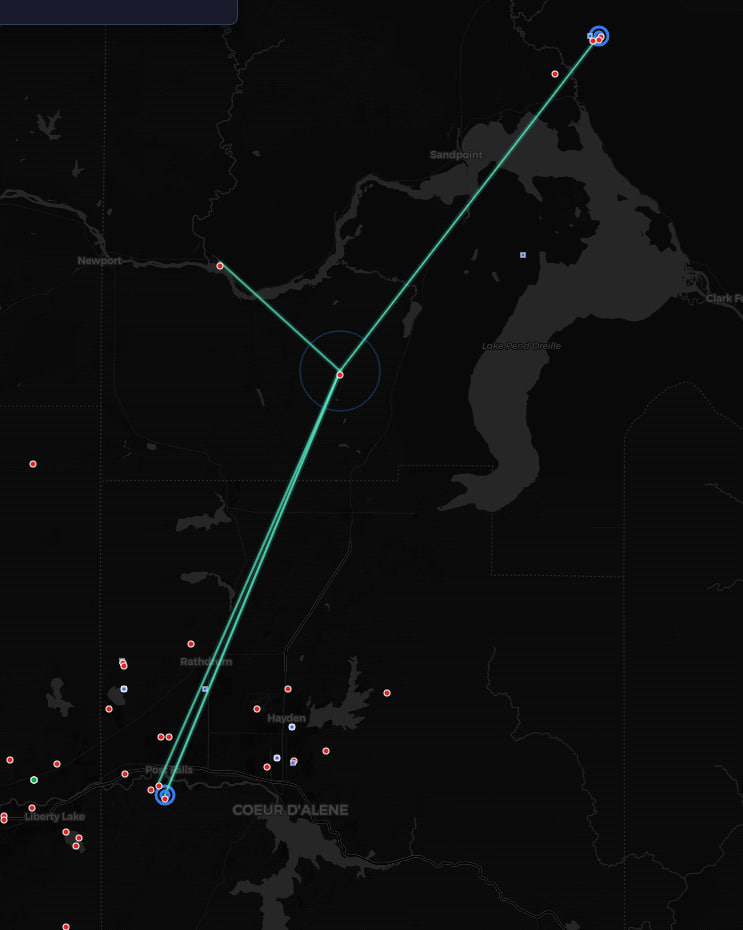
At its heart, MeshCore uses LoRa radios to send small data packets over impressive distances — often several miles, and much farther with a well-placed repeater on a tower or hilltop. Mountain top nodes can cover 50 miles to other mountain tops. When you send a message, it does not need a straight line to the recipient. It can hop through intermediate nodes, each one passing the message along until it reaches its destination or a repeater that serves a wider area.
Messages hop from node to node — the more nodes and repeaters in your area, the farther your messages can travel.
Repeaters are the backbone of a strong mesh. A repeater sits at a high location — a tower, rooftop, or hill — and listens for traffic from handheld or mobile nodes, then re-transmits it across a much larger area. A single well-placed repeater can connect an entire valley.
Ping the network and see who answers from around the region.
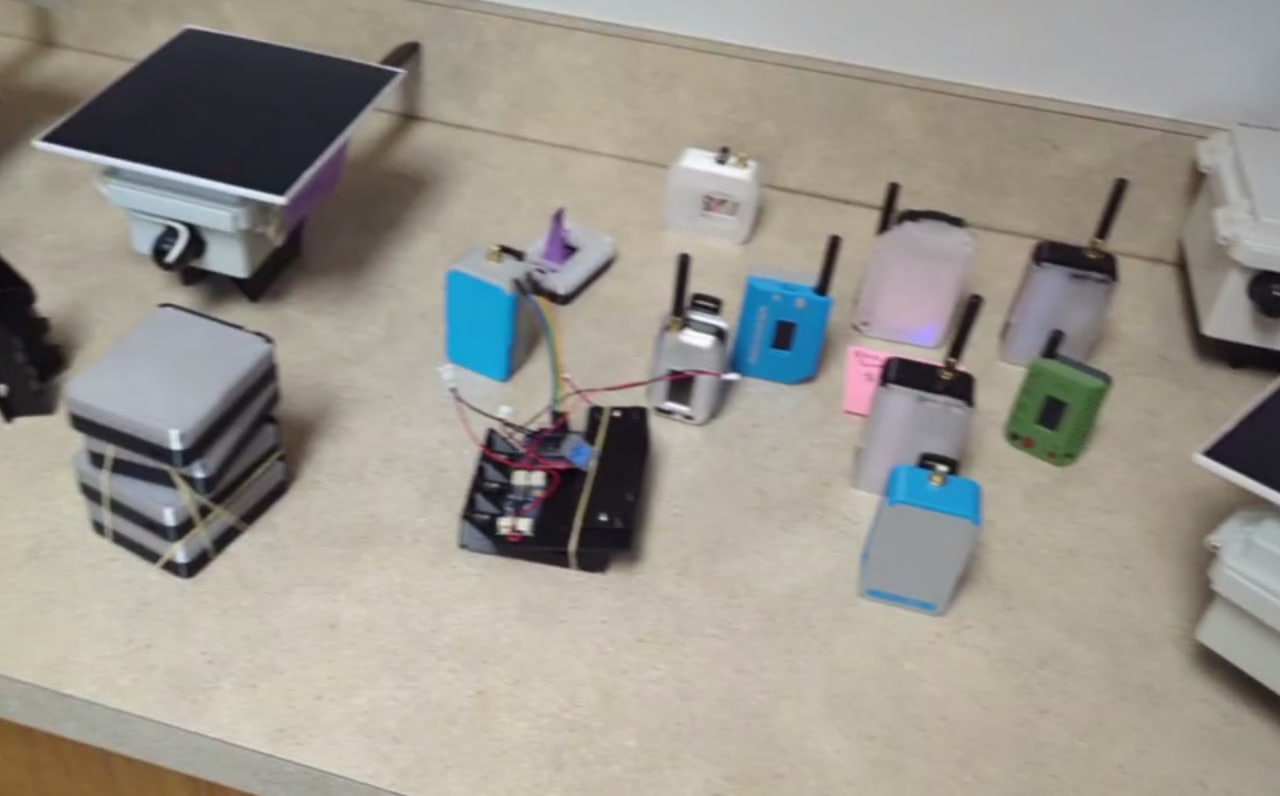
A repeater unit (left) serves the wider area; client units connect to it.
You do not need expensive gear to get started. Several affordable devices work with MeshCore, from pocket-sized standalone units to small boards you pair with your phone. Here are a few common options our members use.
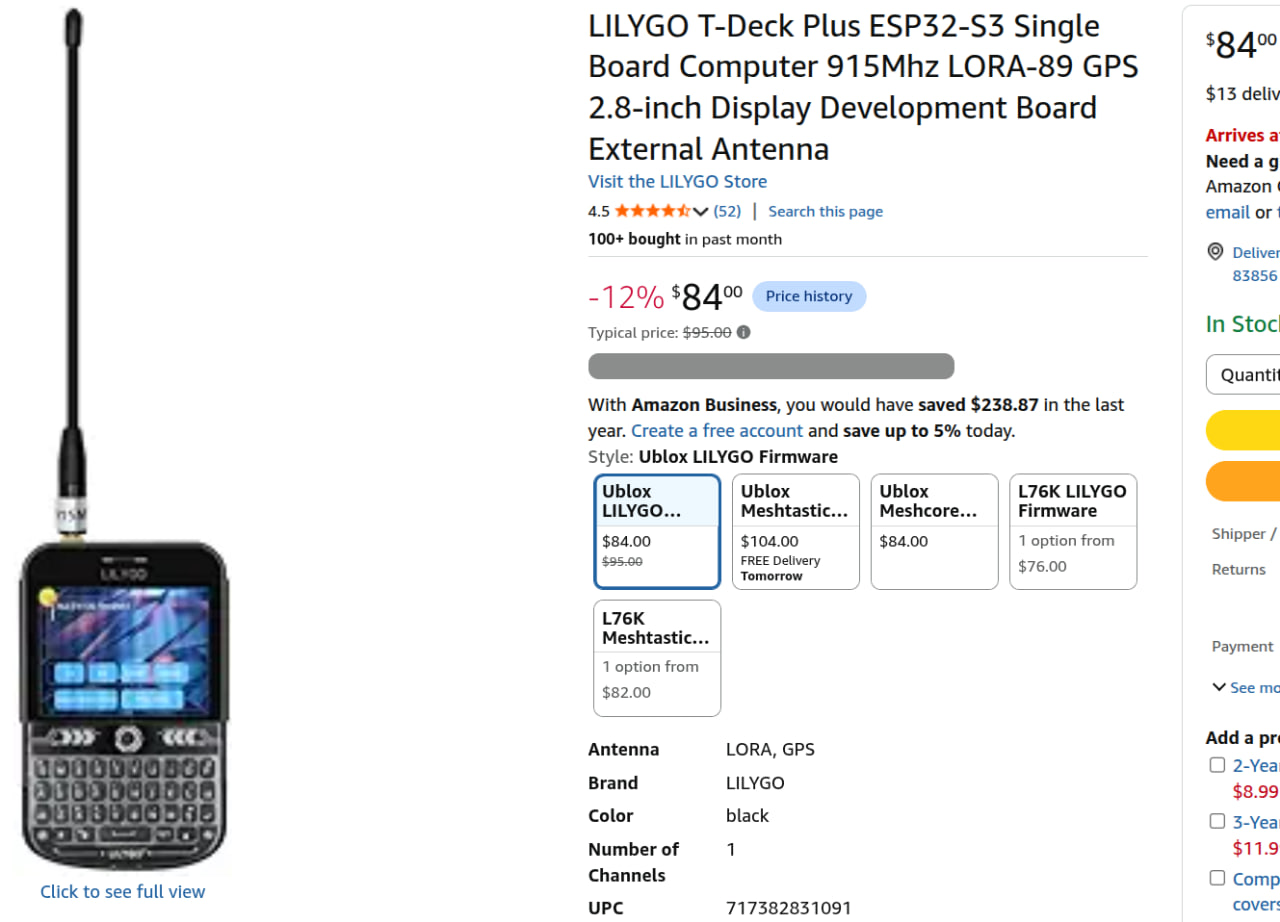
The LilyGO T-Deck Plus — a popular standalone device with its own screen and keyboard, no phone required.
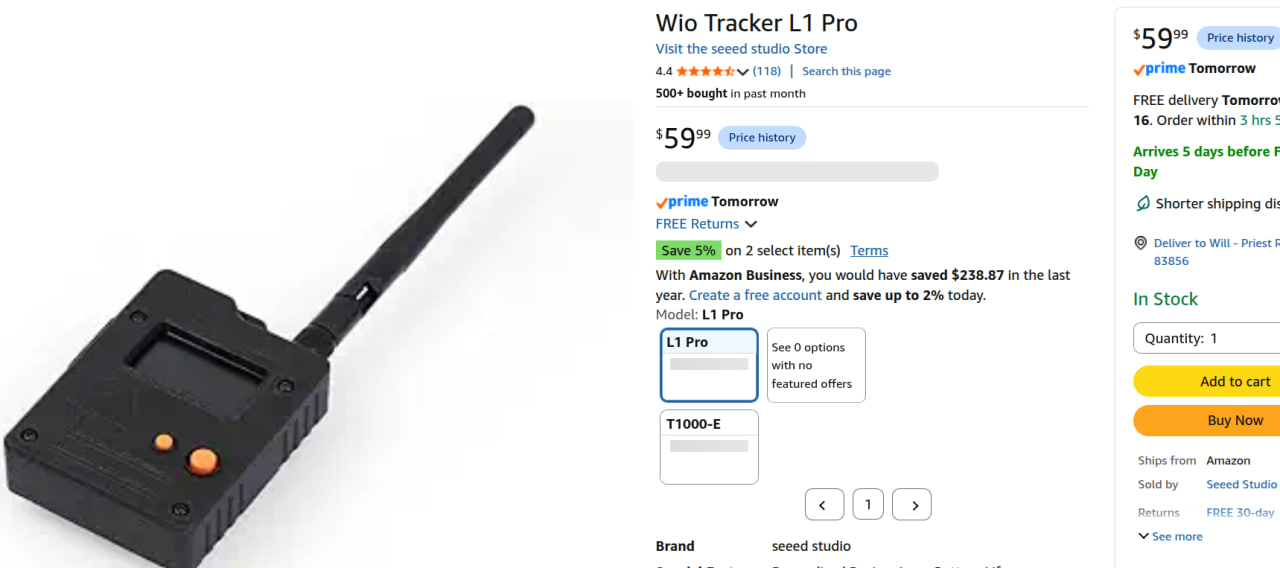
A compact companion unit — small enough to carry in a pack or keep on a windowsill.

The SenseCAP T100 — a nice little Bluetooth companion that pairs with your phone for easy mobile use.
Once you have hardware in hand, getting on the mesh takes four steps: select your device, choose a firmware role, flash the firmware, then configure your radio settings. All of this is done through free web-based tools — plug in your device via USB and follow along below.
Step 1 — Open the Flasher and select your device.
Go to the
MeshCore Flasher,
plug your device into your computer with a USB cable, and find your
hardware in the device list. Use the filter box to search — for example,
type "T-Deck", "SenseCAP", "Heltec", or "RAK" to jump to your board.
Select the entry that exactly matches your device.
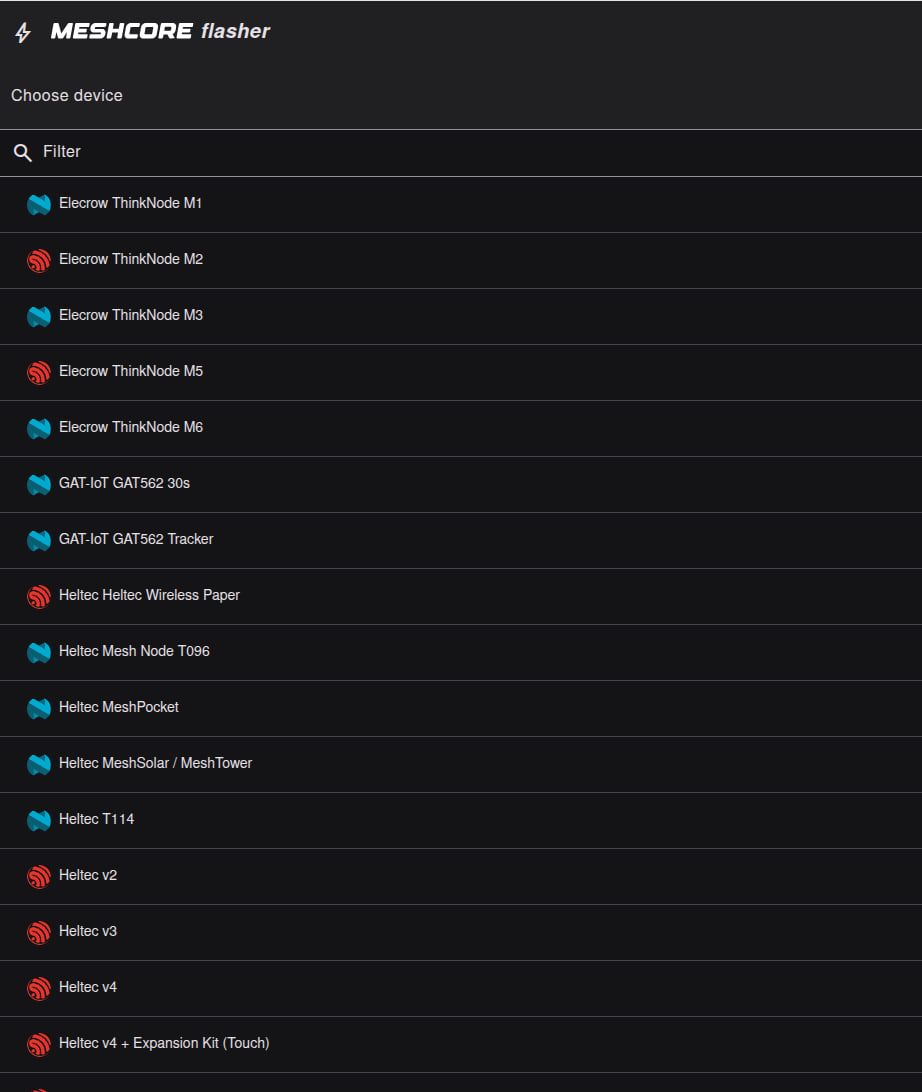
The MeshCore Flasher — find your exact device model in the list before flashing.
Step 2 — Select your firmware role.
After choosing your device, the flasher asks you to pick a role under
Community Firmware. This is one of the most important choices — it
determines what your node does on the network:
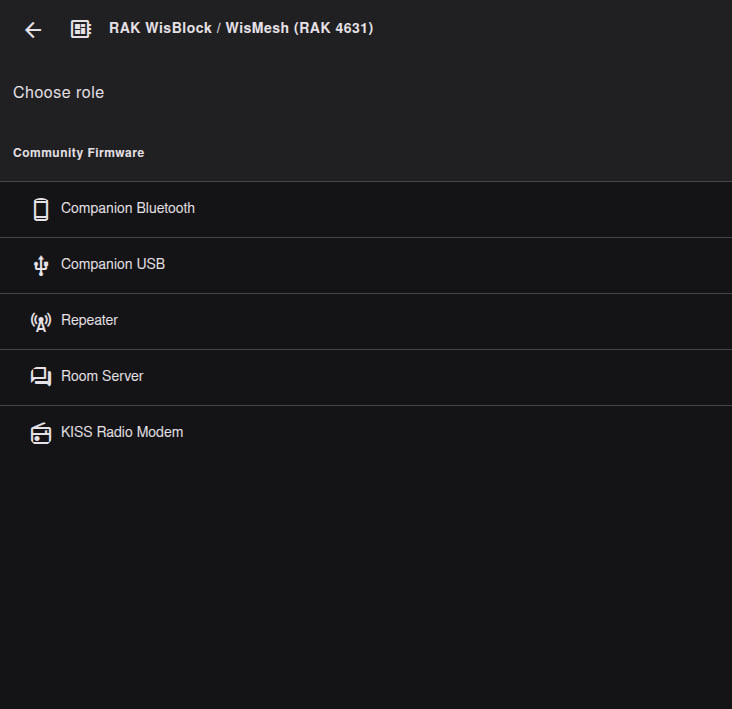
Choose your firmware role — most beginners should start with Companion Bluetooth or Companion USB.
Companion Bluetooth — best for most beginners. Your node pairs
with your phone over Bluetooth so you can send and receive messages on
the go. Choose this for a SenseCAP T100 or any portable device you carry
in a pack or keep in your vehicle.
Companion USB — connects directly to a computer instead of a
phone. Good if you plan to use the
USB Companion app for PC
as your main interface.
Repeater — for a fixed node at a high location (roof, tower,
hilltop) that re-transmits traffic for everyone in the area. Choose this
only when you are ready to install a node that serves the community
24/7.
Room Server — hosts group chat channels that multiple users can
join, like a local message board. More advanced; most people start with a
Companion first.
KISS Radio Modem — for integrating MeshCore with other software
via a KISS TNC interface. An advanced option for experienced users.
Step 3 — Enter DFU mode, erase if needed, and flash.
After choosing your firmware role, the flasher shows a version selector
and three action buttons. This is where the actual firmware install
happens. With your device plugged in via USB, follow these steps:
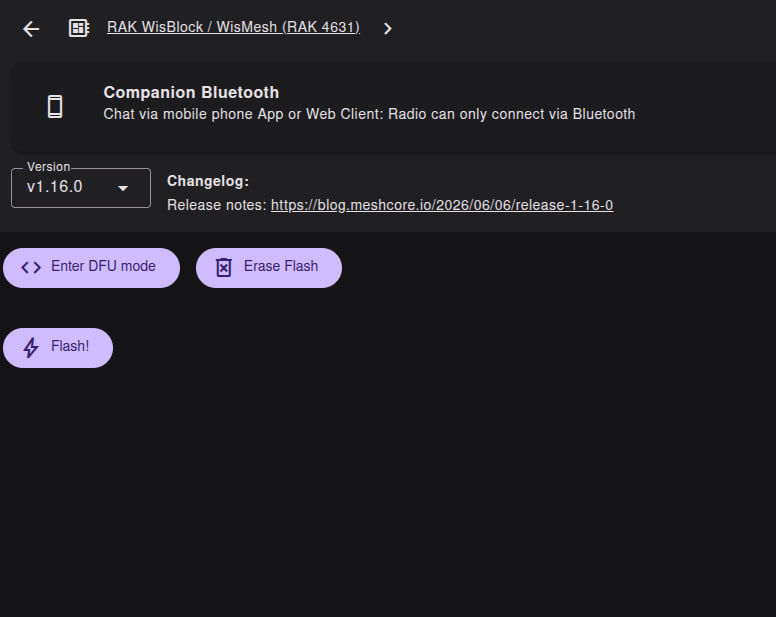
The flash screen — use these buttons in order when setting up or recovering a device.
1. Click "Enter DFU mode" — This puts your device into Device
Firmware Update (DFU) mode so the flasher can talk to it. Always click
this first before flashing. If your computer does not detect the device,
or a previous flash attempt failed, entering DFU mode usually fixes it.
Your device screen may go blank or show a DFU indicator — that is
normal.
2. Click "Erase Flash" (if needed) — This completely wipes the
device's memory. You do not need this on a brand-new device, but use it
when:
• Re-flashing a device that was previously set up with a
different role (e.g., changing from Repeater to Companion)
• Recovering a device that is not working after a bad flash
• Starting fresh to eliminate old settings causing problems
Warning: Erase Flash removes everything on the device — you will need to
re-flash and reconfigure from scratch.
3. Click "Flash!" — This writes the selected firmware version to
your device. Wait for the process to complete and do not unplug the USB
cable until the flasher confirms success. You can check the changelog
link on this screen to see what is new in each version.
Typical first-time setup: Enter DFU mode → Flash!
Re-flashing or troubleshooting: Enter DFU mode → Erase Flash → Flash!
Step 4 — Configure your radio settings.
Once flashed, open the
MeshCore Setup page
with your device still connected via USB. Set your node name, and make
sure your radio parameters match the local network. For our region, use
the USA/Canada (Recommended) preset — your frequency, bandwidth,
coding rate, and spreading factor must match other nodes or you will not
be able to communicate.
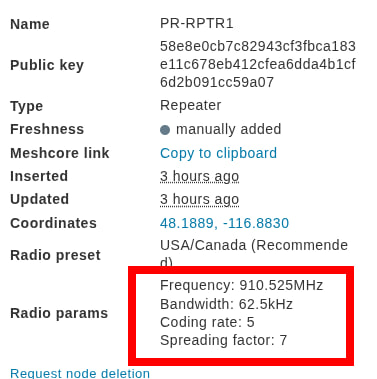
Match your radio parameters to the local network — the config page is where you set these after flashing.
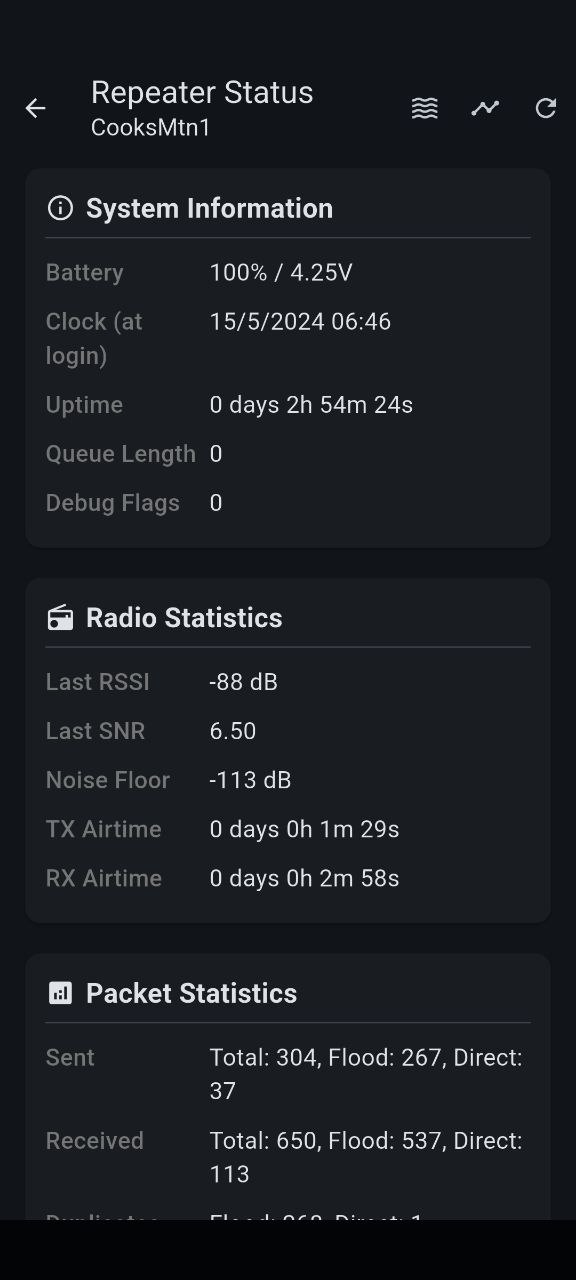
Once configured, use the USB Companion app to view repeater status and connected nodes. After the page loads, you can install it as an offline app using the small computer icon on the right side of your browser's address bar — it will then launch like a local program.
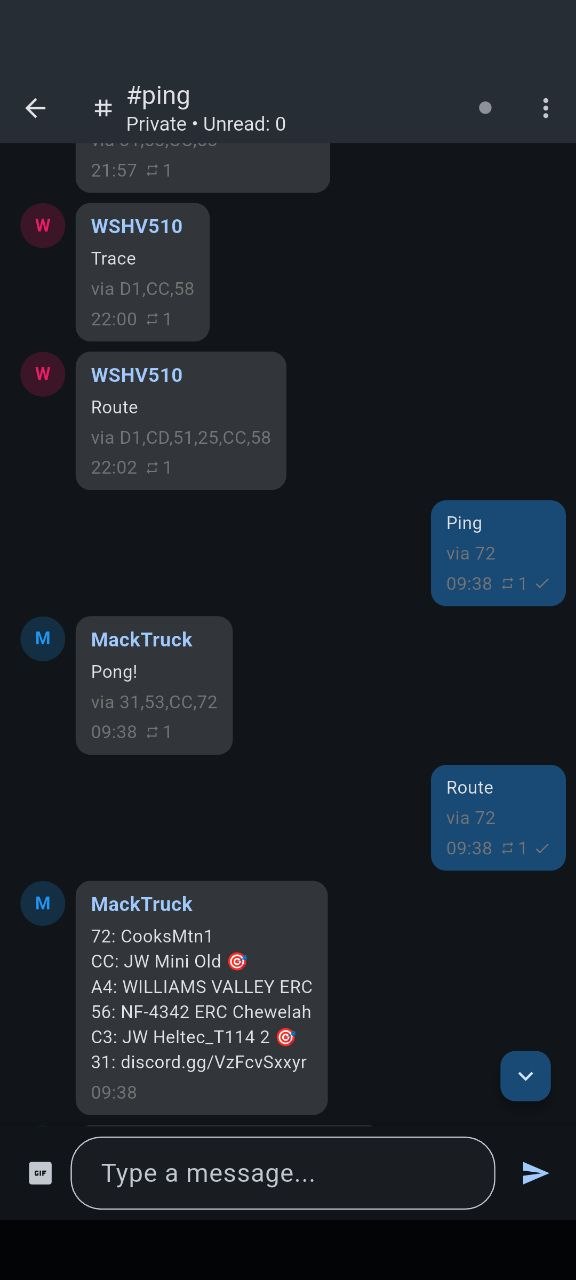
Ping the network to confirm your node is alive — automated responses tell you who is reachable.
Repeaters are what turn a handful of handheld nodes into a regional network. POCRG and the Inland Northwest mesh community are installing repeaters on towers, rooftops, and hilltops to link valleys, towns, and rural homesteads together. A repeater can run on solar and battery power, making it ideal for true off-grid resilience.
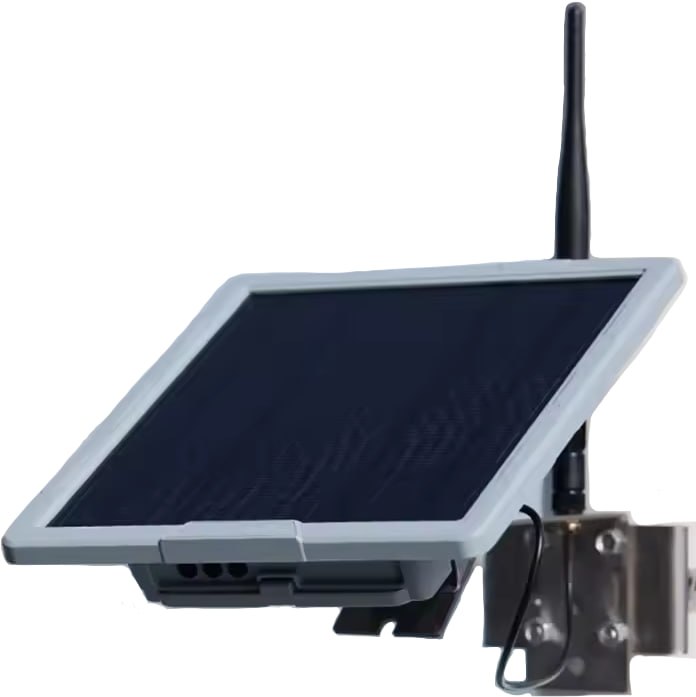
A MeshCore repeater — the heart of wide-area coverage.
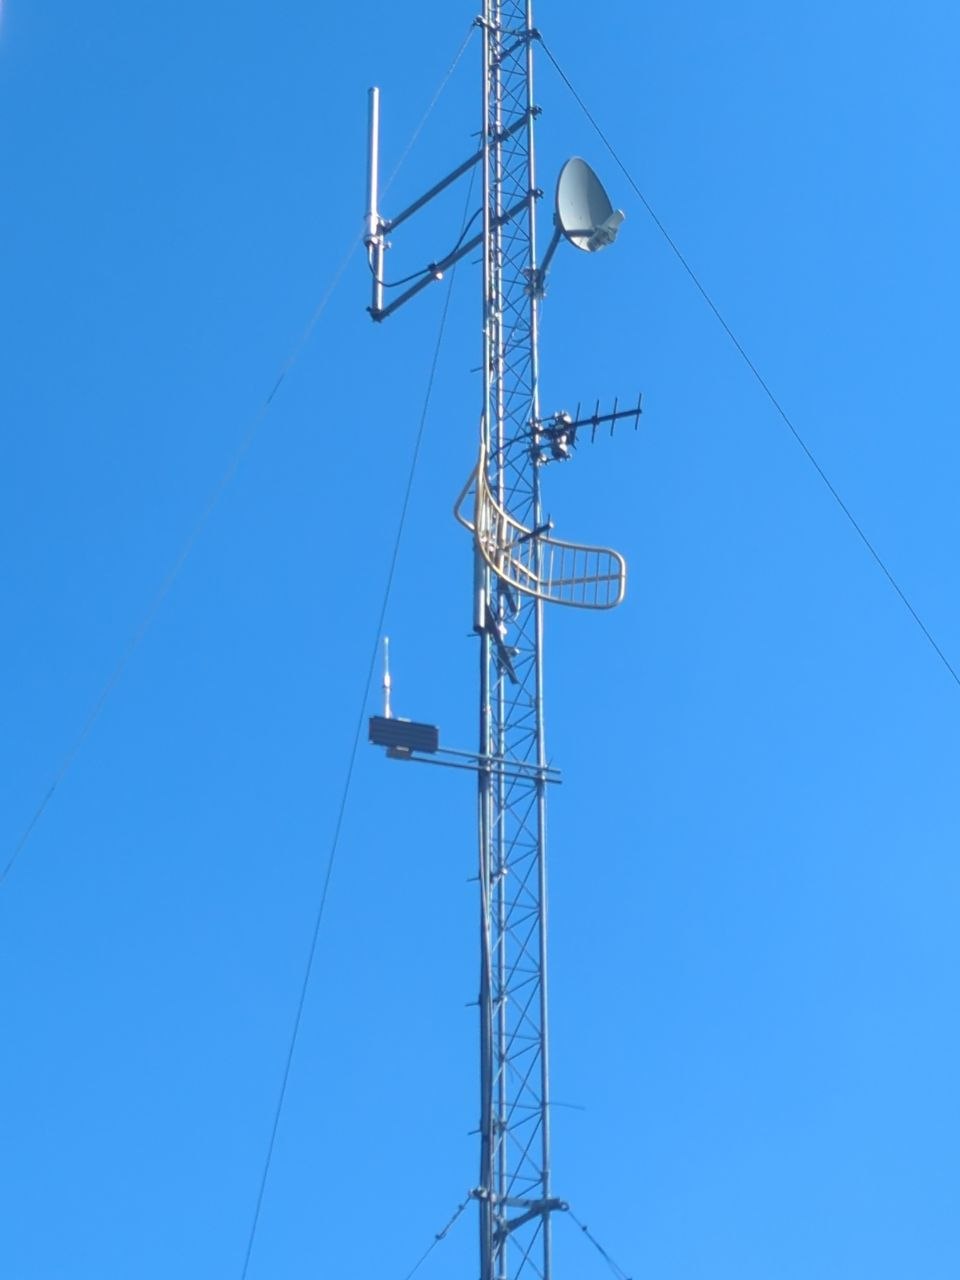
A node installed on a tower — height is everything for repeater coverage.
A repeater node ready for tower installation.
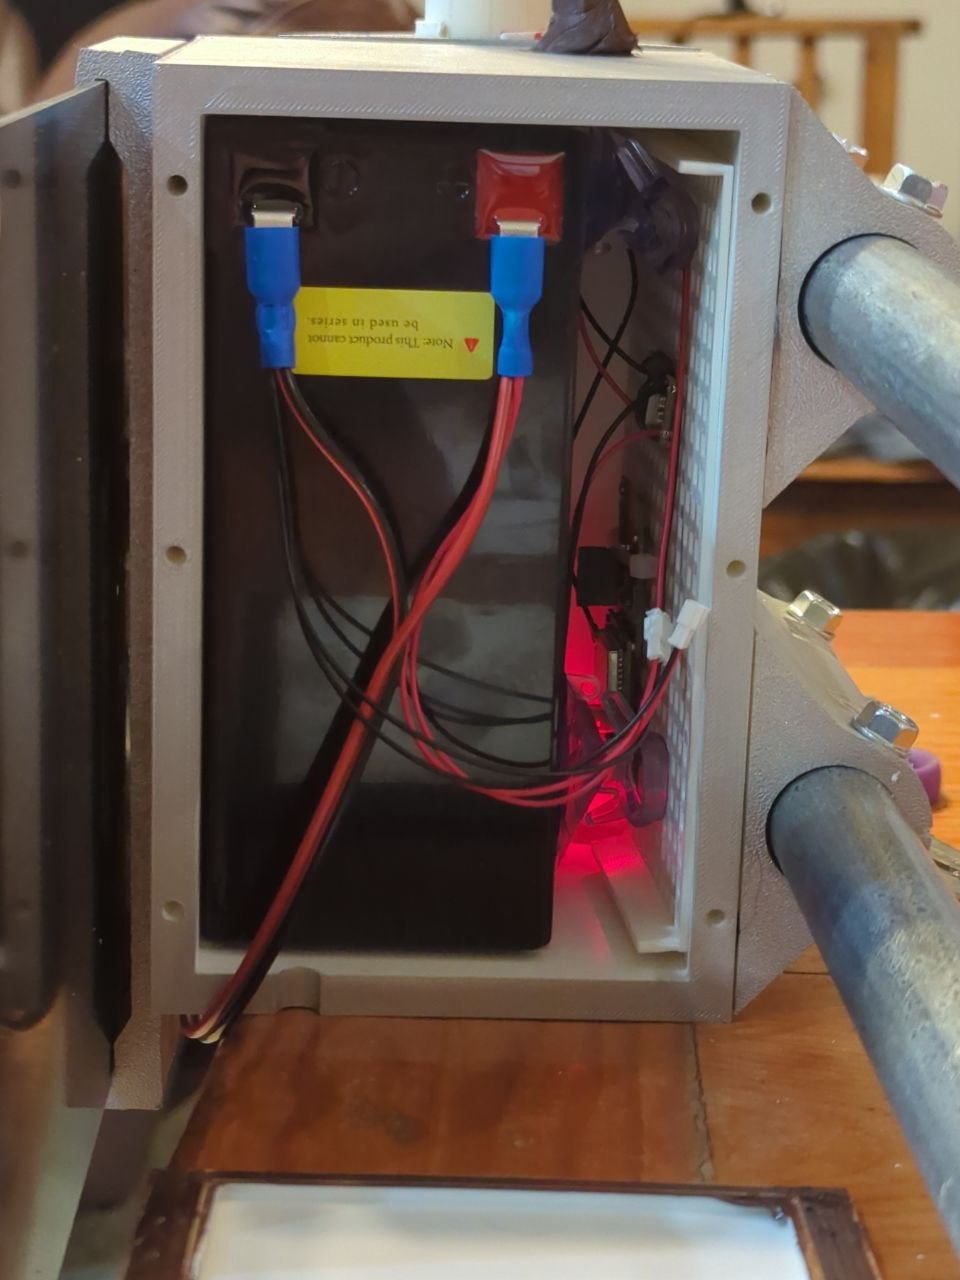
Battery backup keeps a repeater running when the power goes out.
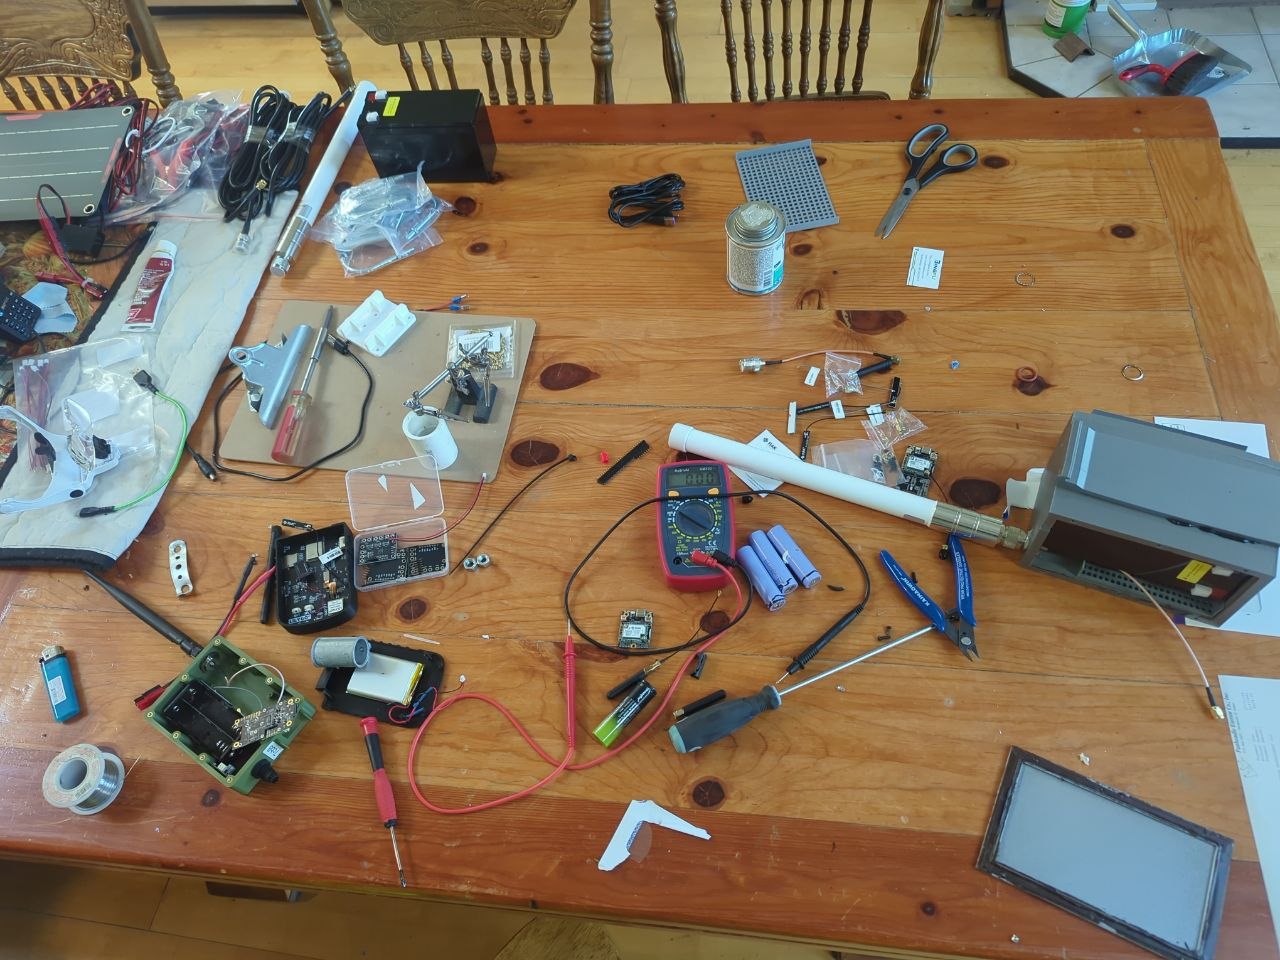
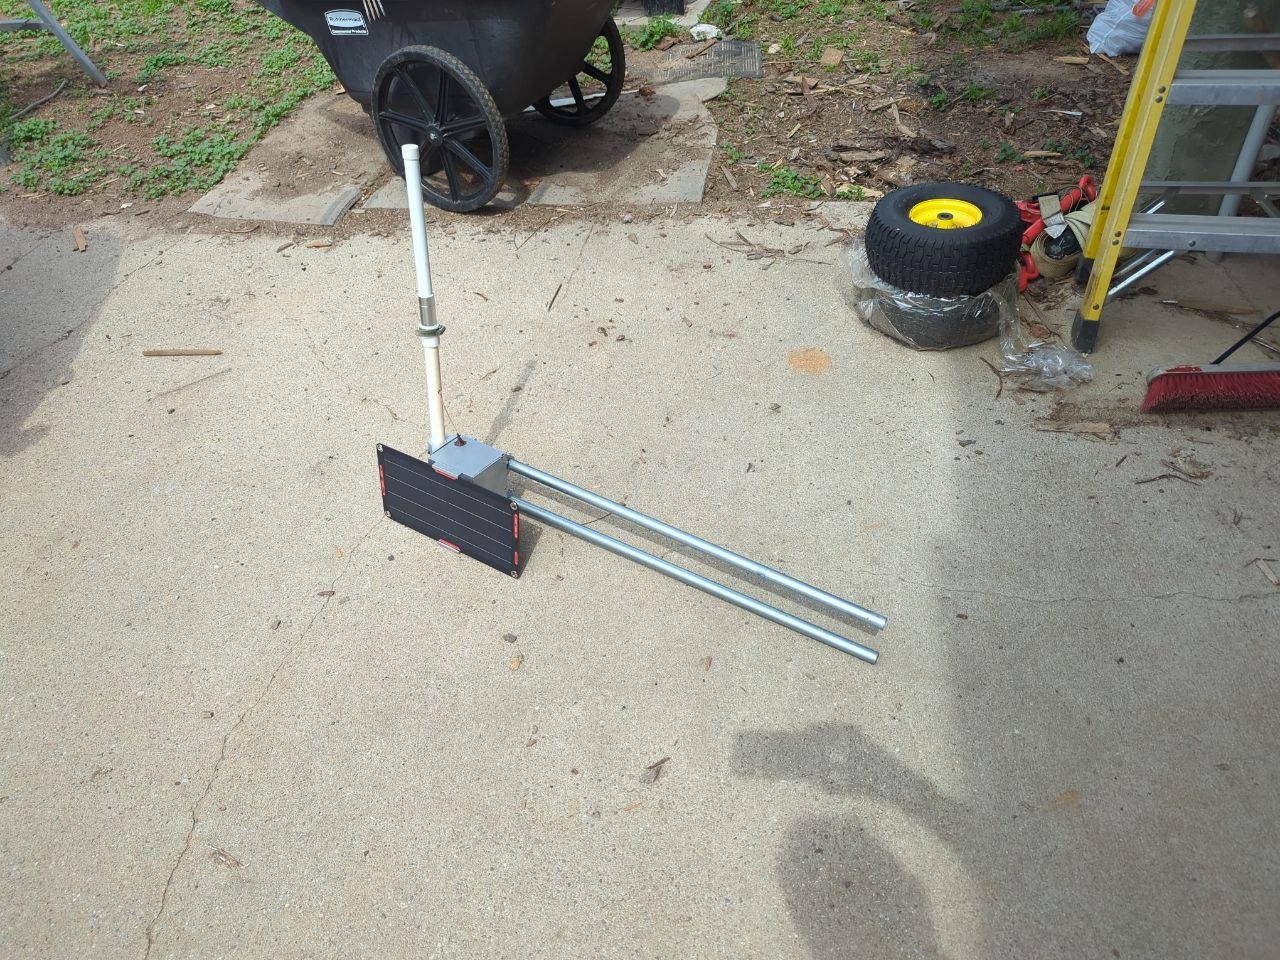
DIY repeater builds are common — hams love a good project box.
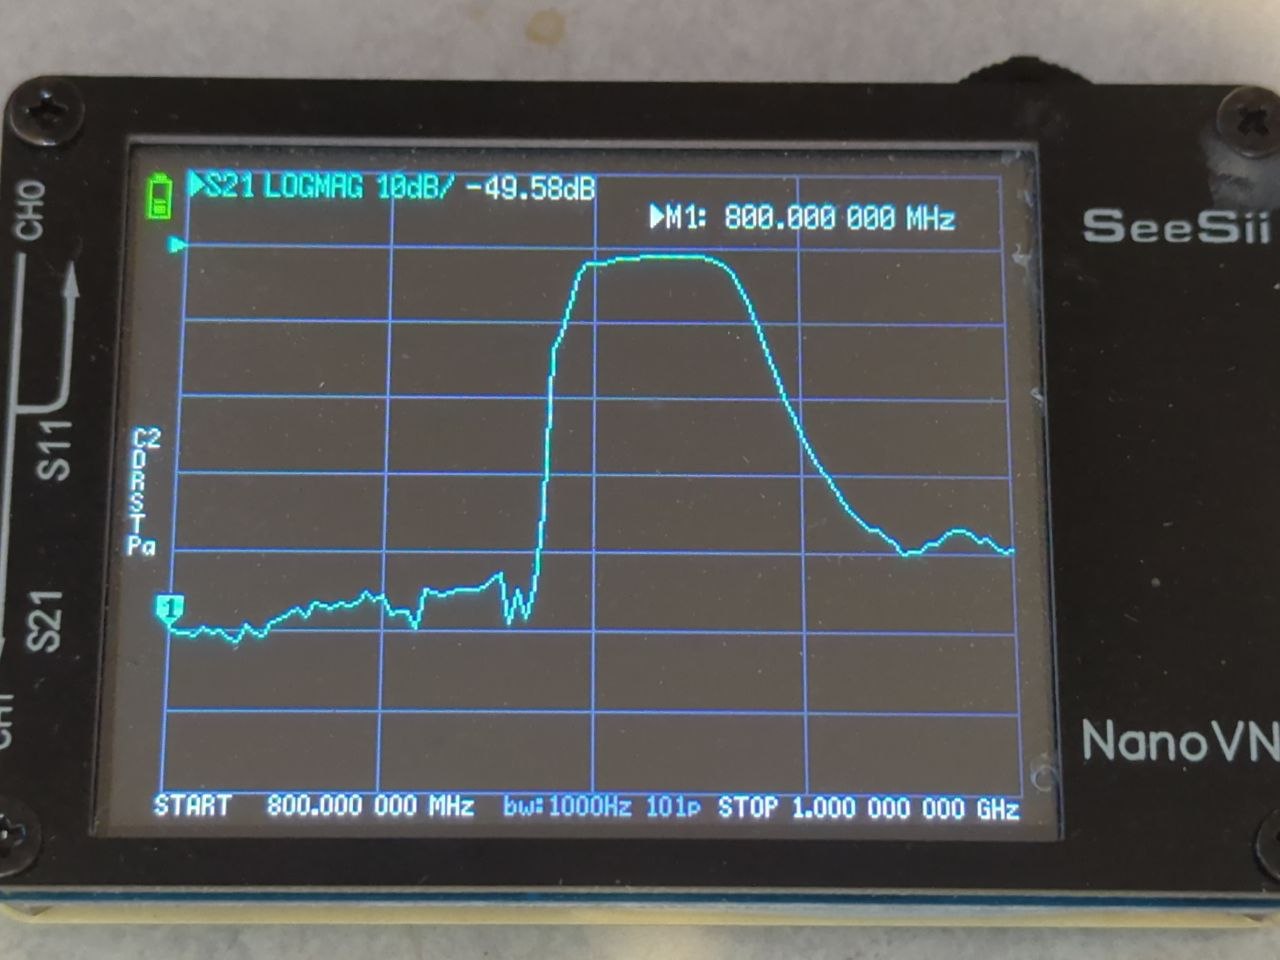
At busy sites, a bandpass filter helps keep your repeater clean and reliable.
One of the best parts of MeshCore is watching the network come alive on a map. You can see nearby nodes, check repeater status, discover who is reachable, and plan where the next repeater might do the most good. Our region has a dedicated map — the Inland Northwest Mesh CoreScope — where you can zoom in on Pend Oreille County and find club nodes and repeaters already on the air.
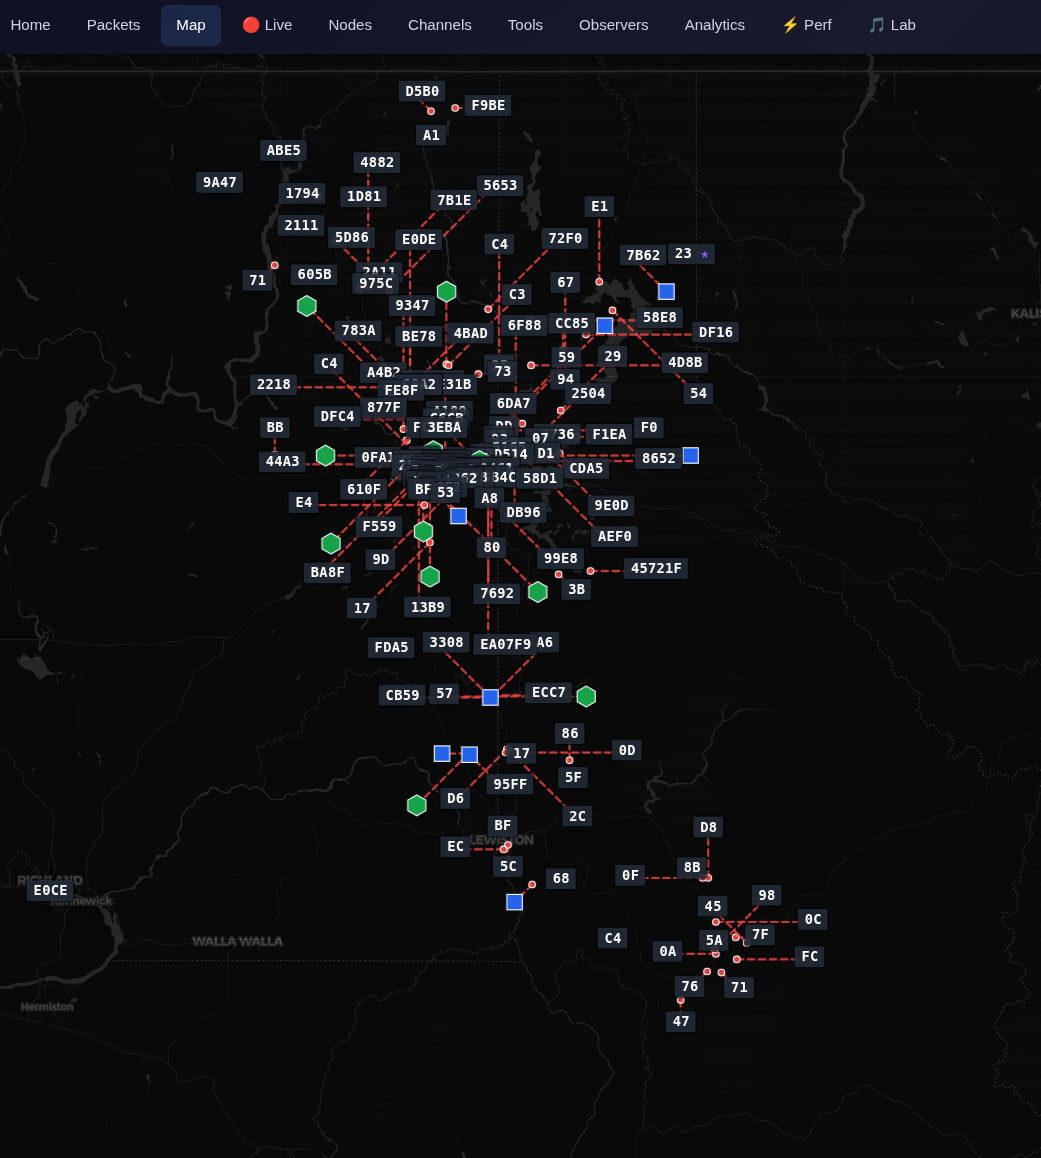
CoreScope — the Inland Northwest mesh map with live node and repeater data.
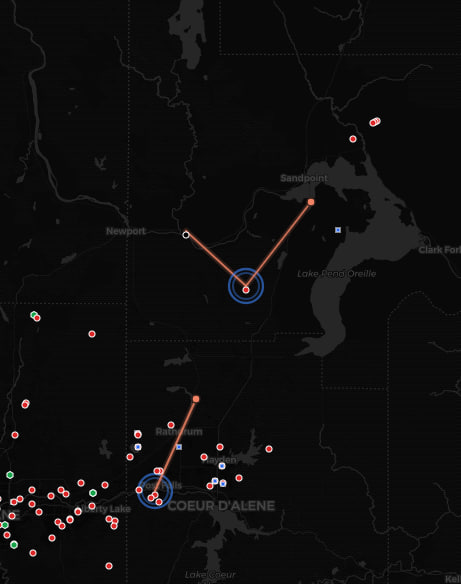
Live repeater view on CoreScope — see which repeaters are up and who they can reach.
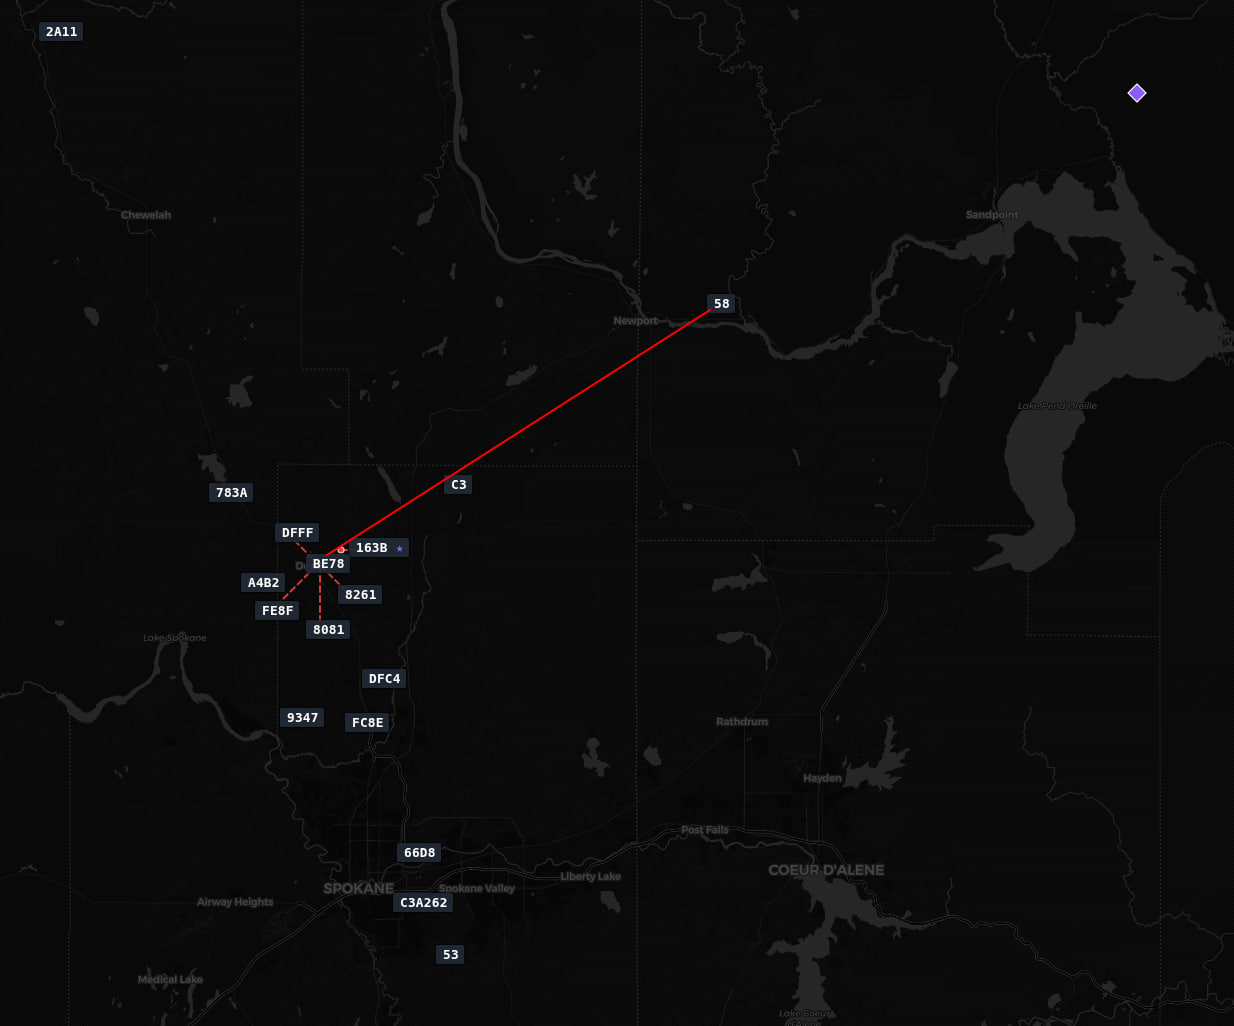
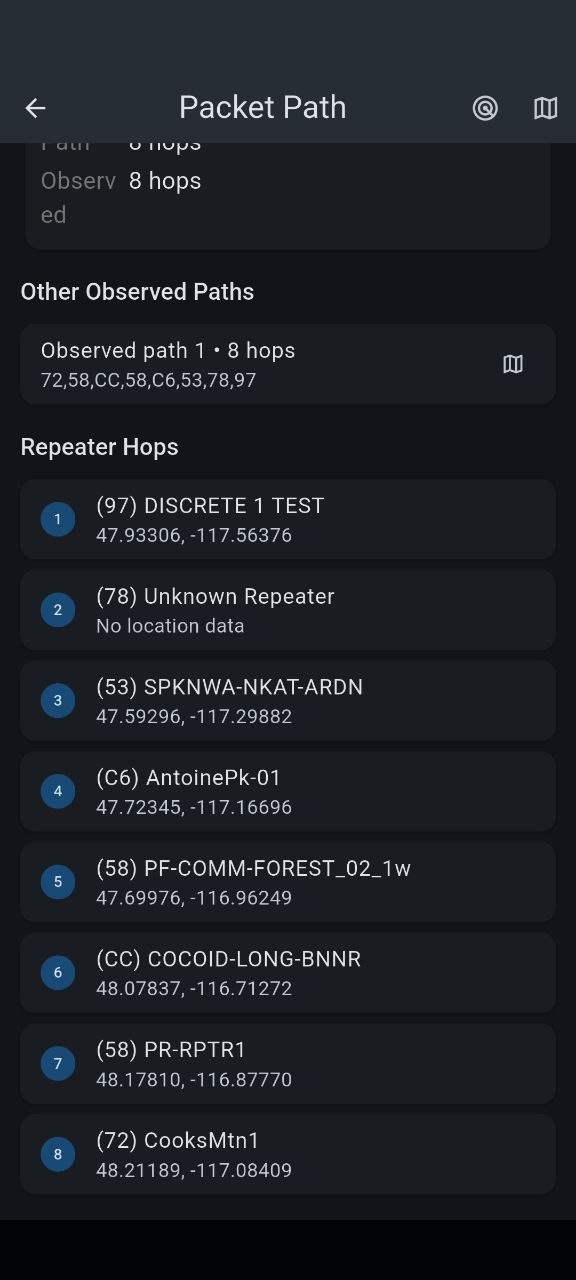
Check a repeater's neighbors to understand your local mesh topology.
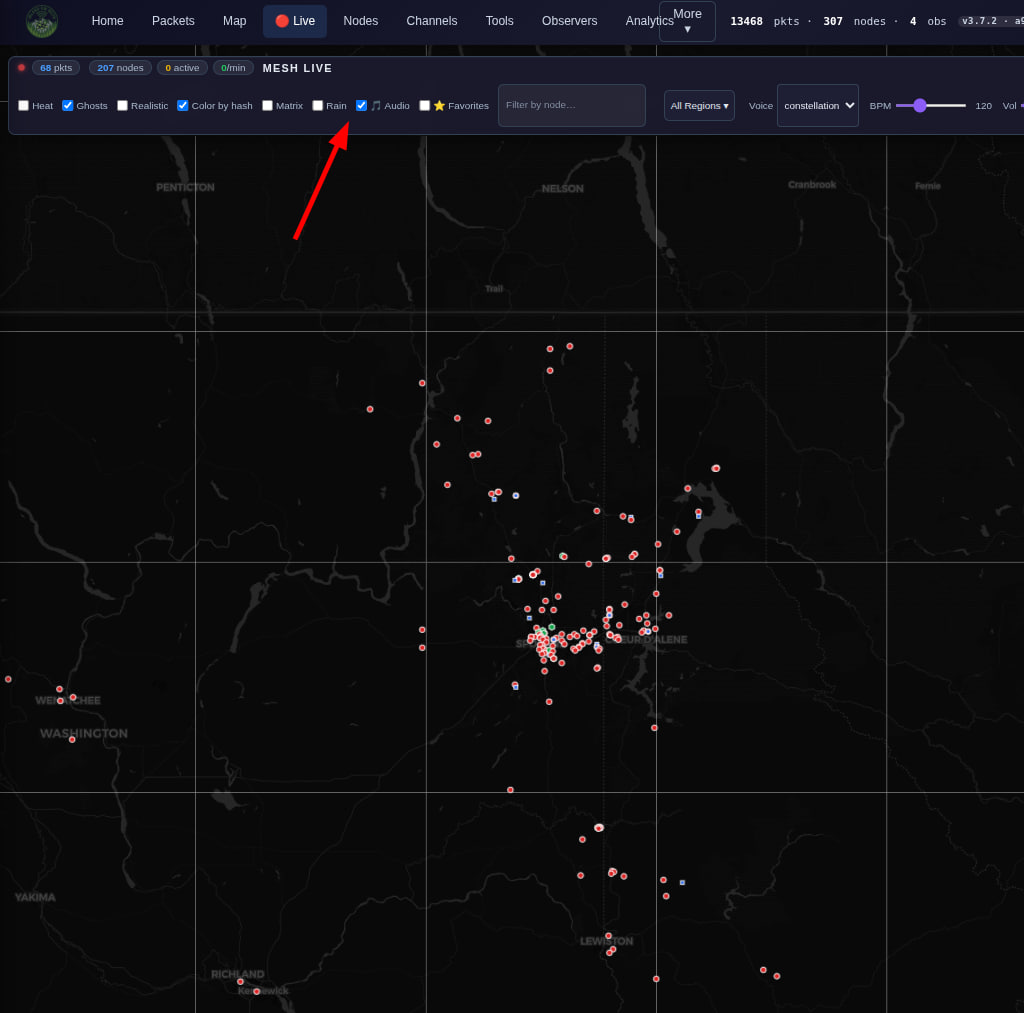
Enable audio alerts on the live map to hear when new nodes appear nearby.
Wardriving is the practice of driving (or hiking) through an area with a mobile MeshCore node to discover and map nodes and repeaters you might not know about. It is a fun way to explore coverage, find weak spots, and contribute data that helps the whole community. Mount an antenna on your vehicle roof, open the wardriving map, and see what the mesh looks like from the road. The wardriving map takes a minute to load its data — be patient, it is worth the wait.
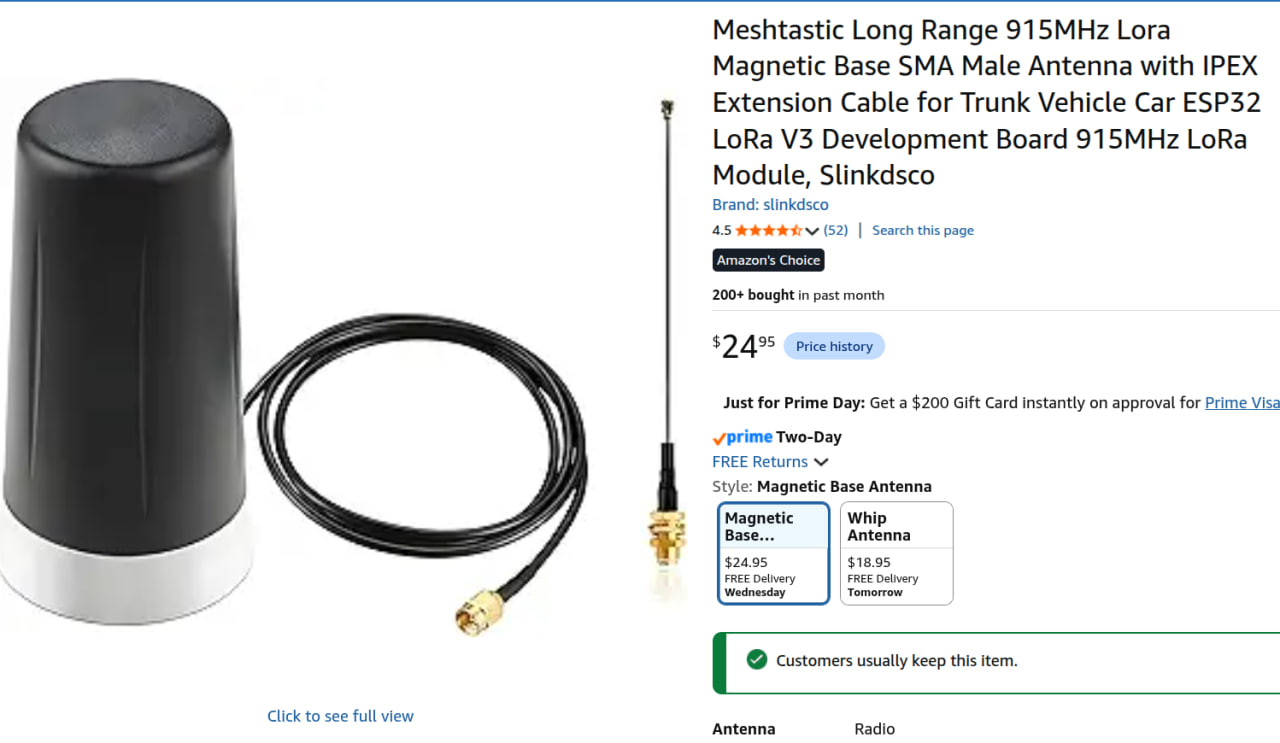
A roof-mounted antenna is ideal for wardriving — the higher the antenna, the more nodes you will discover.
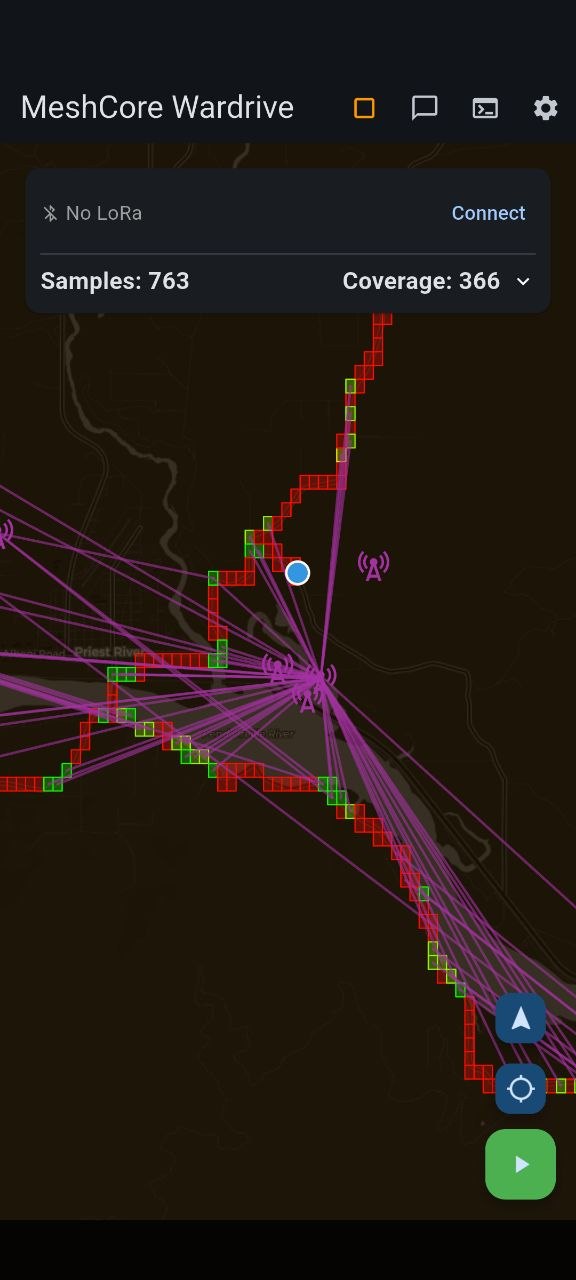
The wardriving map records nodes you discover as you travel through an area.
Ham radio has always been about communicating when nothing else can. MeshCore adds a modern, digital layer to that tradition. It is low-power, license-free friendly for experimentation (ham bands apply for repeaters), and it scales naturally — every new node makes the network better for everyone.
For emergency communications, MeshCore provides a text-messaging backbone that works without internet or phone service. For homesteaders and rural residents, it offers a way to stay in touch with neighbors across miles of forest and farmland. For our club, it is another tool in the toolbox alongside our 2-meter and GMRS repeaters — complementary, not a replacement.
You do not need to be an expert. You do not even need a ham license to start experimenting with a companion node (check current regulations for your setup). Our Tuesday breakfast meetings are a great place to ask questions, see hardware in person, and get help flashing your first device.
Pend Oreille County Radio Group is actively building MeshCore infrastructure in our area — repeaters, companion nodes, and tower installations that connect our communities. We share what we learn, help newcomers get started, and work with the broader Inland Northwest mesh community to extend coverage across the region. Whether you are a seasoned ham or someone who just wants a reliable way to text your neighbor when the power is out, you are welcome to join us.
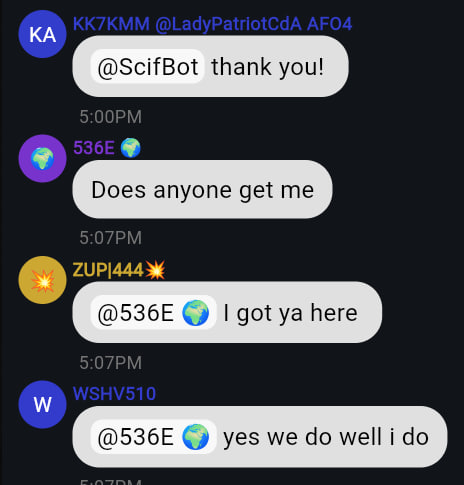
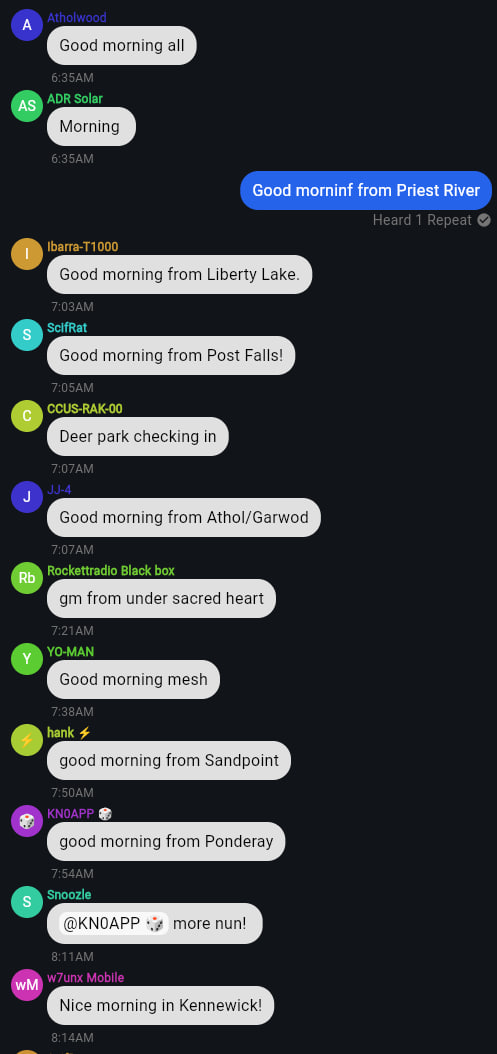
Have fun with it — customize your node name and join the conversation.
1. Get a compatible device (T-Deck, SenseCAP T100, or similar).
2. Open the
MeshCore Flasher
— pick your device, choose Companion Bluetooth, then click Enter DFU
mode and Flash! (use Erase Flash if re-flashing an existing device).
3. Configure your node at the
MeshCore Setup page.
4. Check the
CoreScope map
and look for nearby nodes.
5. Come to a POCRG breakfast and say hello — we love helping newcomers!